Live streaming worship services are a huge part of our lives right now. There are many of us doing it for the first time and are put under the pressure of getting it ready to go in less than a week or two without having any prior knowledge of it. Many of us, thinking we would never be doing this, are becoming pros at it overnight. However, there are still a lot of people out there looking for a solution that is easy and inexpensive. I have found a few different options that are free. In this blog, I’m going to walk you through setting up a live stream using the free, basic version of vMix and sending it to your Facebook page or group or your Youtube channel. This can be done using either a display capture or using NDI (network device interface).
If you have EasyWorship presentation software, and you have a video camera and capture card or a webcam, you can live stream your camera feed and also have lower thirds text overlaid. You can also send any media or presentation slides you have in EasyWorship to your live stream.
To watch a tutorial video click HERE
Installing vMix
You can go to the vMix website and click Download at the top of the page. Then, click to download the latest version of vMix. It will include everything you need to get this done. Once downloaded, install it and then open it from the icon on your desktop or from your Windows start menu. If you need more features than what comes with the basic version of vMix, you can check out their paid versions as well. That will give you access to things like higher video resolutions and more. You can also currently get a 60 day free trial of the Pro version.
HERE is a link to their version comparison chart.
Setting up EasyWorship and vMix
Creating a Video Feed in EasyWorship
Creating a feed in EasyWorship requires you to have a camera connected to your computer via a capture card or USB connection or built into the computer monitor. Once you have your camera set up with your computer, follow the steps below to create a feed in EasyWorship.
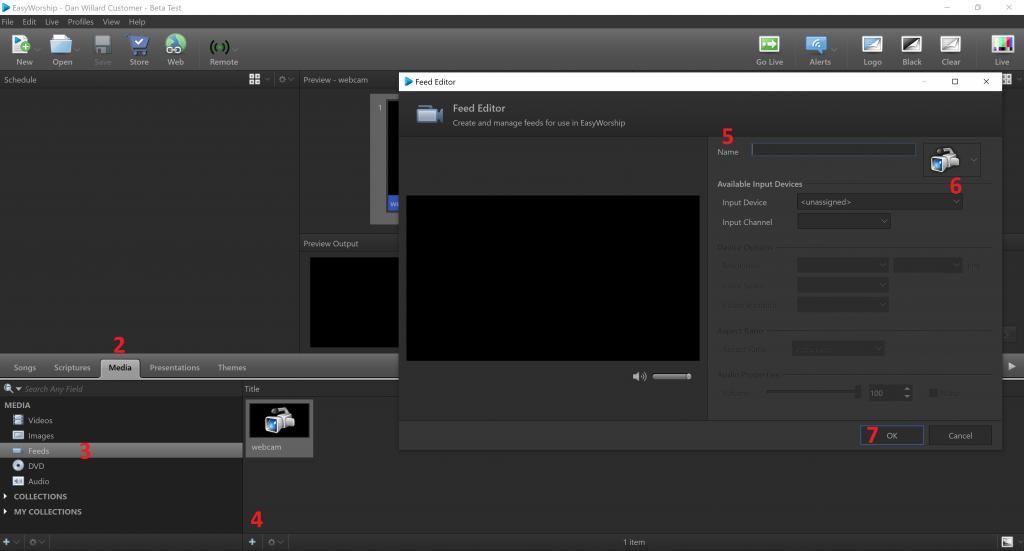
- Open EasyWorship
- Go to the Media tab
- Click on Feeds
- Click the plus sign at the bottom of the Feeds library (this opens the new feed window)
- Name your feed at the top
- Click the dropdown under Input Device and select your camera (your preview should now show on the left)
- Click OK
Creating a Lower Third Text Theme
You can send the feed you created live by itself by selecting that feed and clicking Go Live at the top of EasyWorship. If you want to include lower third song lyrics, scriptures, or sermon notes, you can create a theme that will make it easy to apply to any song, scripture or presentation. The steps will basically be the same to create a song, scripture, or presentation theme, so for this example, I’ll just walk you through creating a song theme.
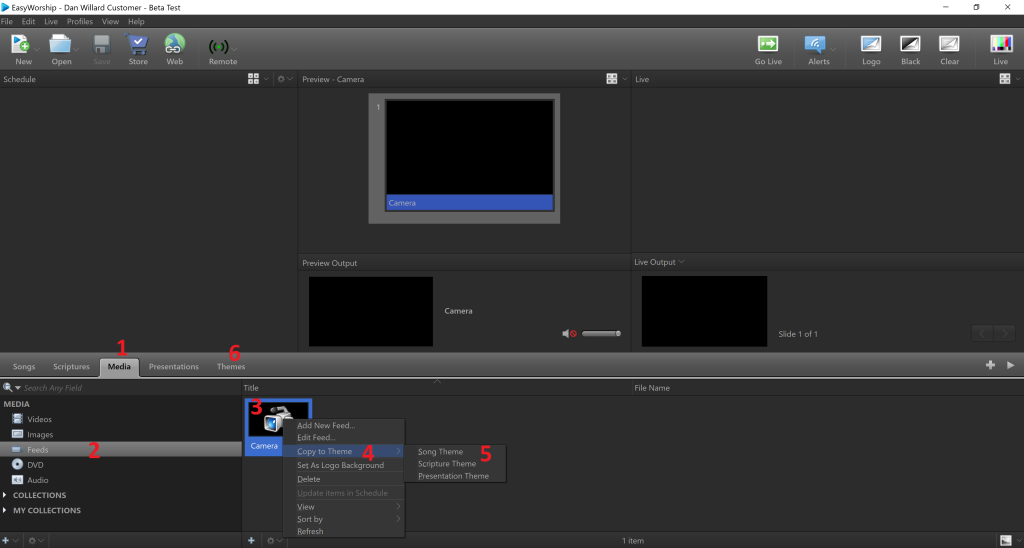
- In EasyWorship, go to the Media tab
- Click on Feeds
- Right-click the feed you created
- Select Copy to Theme
- Select Song Theme (or you can choose Scripture or Presentation here)
- Go to the Themes tab
- Right-click the feed theme that you just created
- Select Edit Song Theme
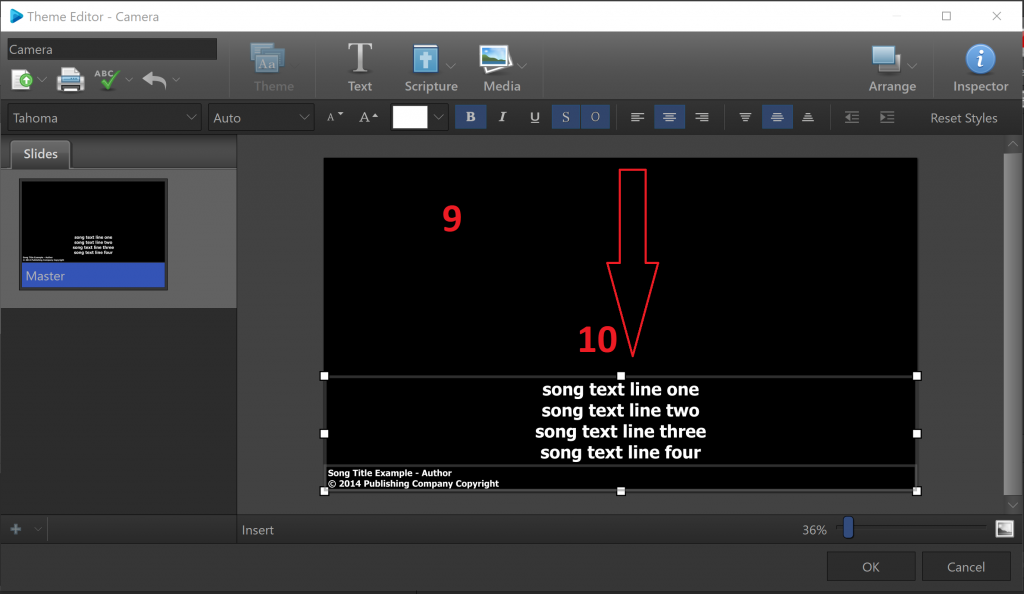
- Click in the slide on the right to select the text box
- Click and drag the top, center resize marker down to the lower thirds of the slide
- Click OK
Adding the Theme to a Song
You can add the theme you created to a specific song by adding a song to your schedule and then drag and drop the theme onto that song in the schedule. If you want to use the theme on all your songs, you can set it as your default song theme by right-clicking on the theme and choosing Set as Default Song Theme. That way, any song that uses the default theme will use it and the background will be your feed and the text will be in the lower thirds of the slide.
Adding EasyWorship to vMix via Display Capture
You can capture the output screen of EasyWorship in vMix very easily and live stream it to your Facebook page/group or Youtube channel. If you’re using the same computer to run EasyWorship and vMix, this will be the easiest way and will still allow you to have your EasyWorship output displaying on your projector or TV screen.
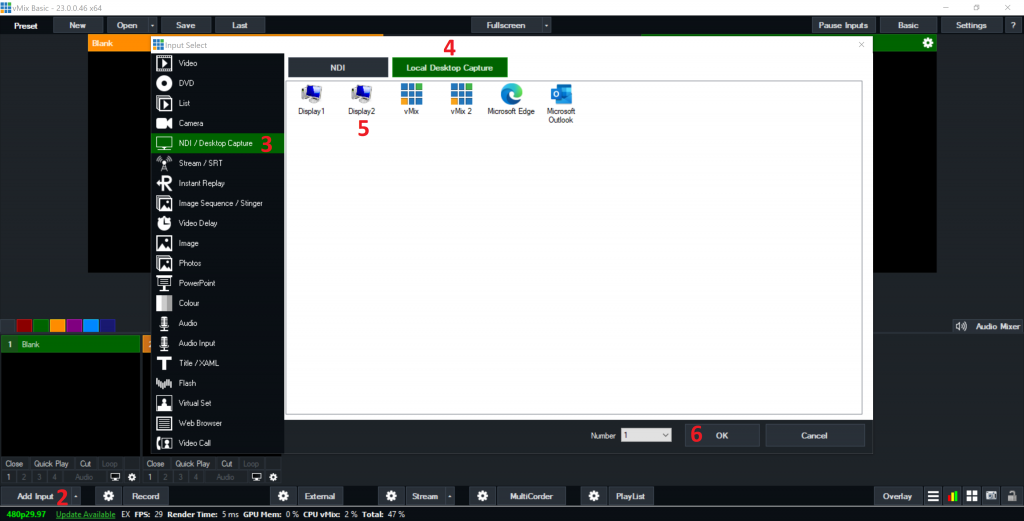
- Open vMix
- Click Add Input in the bottom left corner
- Select NDI/Desktop Capture
- Click Local Desktop Capture at the top
- Select the display your EasyWorship output is going to
- Click OK
- Go Live to your song in EasyWorship
When your EasyWorship is live, and you’ve added the input, you will see that output in the upper right display in vMix.
Adding EasyWorship to vMix via NDI
You can also capture the output of EasyWorship in vMix using NDI and stream it to your Facebook page/group or Youtube channel. You can use NDI as an input in vMix whether you’re using the same computer or even if you are using two different computers, one running EasyWorship and the other vMix, on the same network.
Before adding the input to vMix, you will need to make a change in EasyWorship so it is sending the output through NDI.
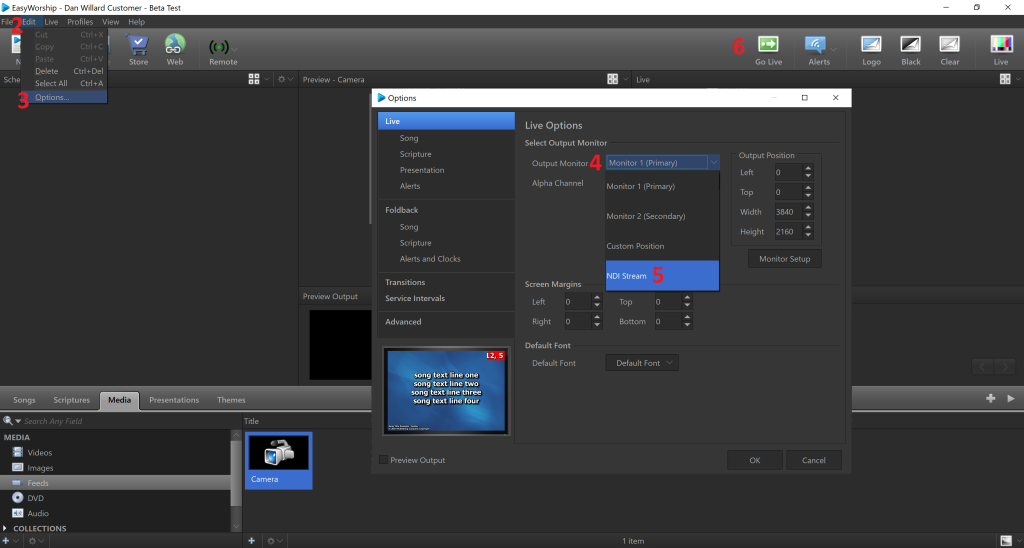
- Open EasyWorship
- Click the Edit menu
- Click Options
- Click the dropdown menu for Output Monitor
- Select NDI Stream
- Go Live to your song in EasyWorship
Now that EasyWorship is sending the NDI stream, you can add that input to vMix.
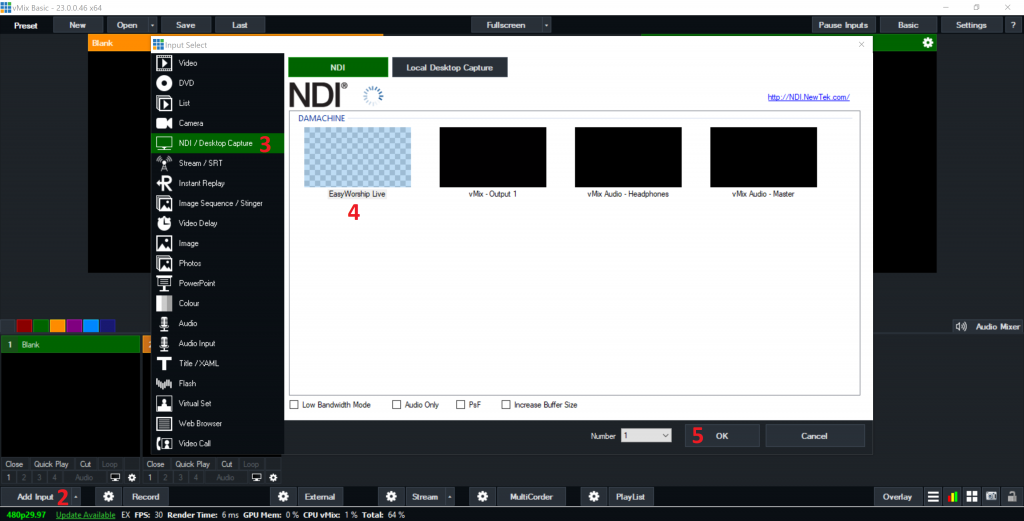
- Open vMix
- Click Add Input in the bottom left corner
- Select NDI/Desktop Capture
- Select the EasyWorship NDI stream
- Click OK
Live Streaming from vMix
There are a couple of ways to set up streaming for Facebook. You can log into your Facebook account in vMix or use a custom RTMP server.
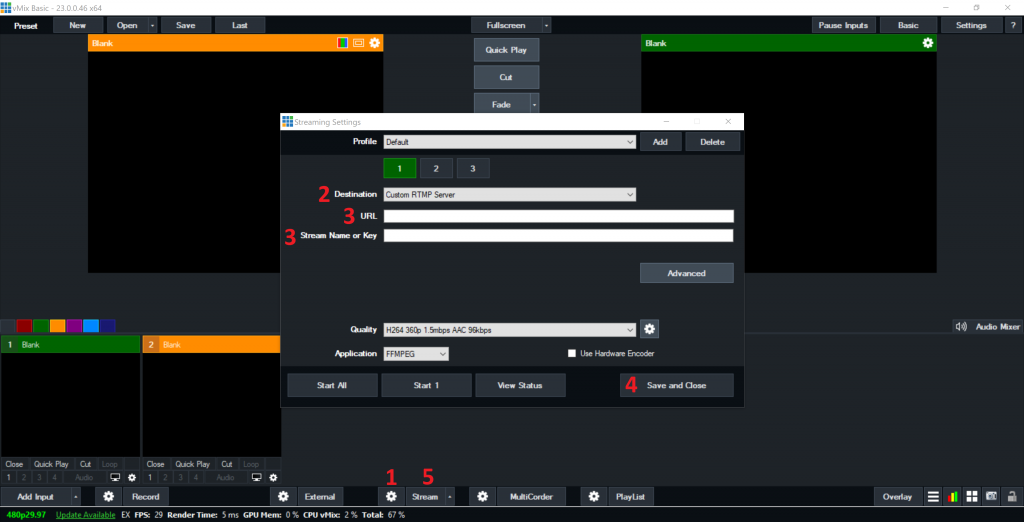
- In vMix, click the setting gear next to Stream at the bottom
- Next to Destination, select Facebook and then you can log in, or select Custom RTMP server and it will ask for a URL and Stream Key.
- Obtain the URL and Stream Key from Facebook and paste them into vMix on the stream settings page. (You can get those when you start a Live Video on Facebook)
- Click Save and Close
- Click Stream
- When you see the preview of your stream on Facebook, click Go Live
Youtube
- In vMix, click the setting gear next to Stream at the bottom
- Next to Destination, select Youtube and then you can log in, or select Custom RTMP server and it will ask for a URL and Stream Key.
- Obtain the URL and Stream Key from Youtube and paste them into vMix on the stream settings page. (You can get those when you start a Live Video on Youtube)
- Click Save and Close
- Click Stream
- When you see the preview of your stream on Youtube, click Go Live